Instructions
Please Read
Disclaimer
 I started
with a black Volquartsen Scope Rail because it was the only rail I could find
that had a channel down the center low enough to see the front sight. When
the rail came in I found that it covered the rear sight dovetail and the rail
would have to be cut. If I cut straight down to the edge of the sight I
would be removing a quarter of the rail and I was worried that I would not like
the balance with the scope and with it that short could not move it back far
enough.
I started
with a black Volquartsen Scope Rail because it was the only rail I could find
that had a channel down the center low enough to see the front sight. When
the rail came in I found that it covered the rear sight dovetail and the rail
would have to be cut. If I cut straight down to the edge of the sight I
would be removing a quarter of the rail and I was worried that I would not like
the balance with the scope and with it that short could not move it back far
enough.
When cutting or drilling always do it perpendicular to the rail,
the pictures make it look like it is at a slight angle but it is not.
 1.
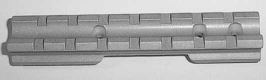
I started by cutting the last section of the rail off with a cut off
wheel.
1.
I started by cutting the last section of the rail off with a cut off
wheel.
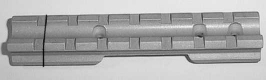
 2.
With the drill bit, drill a hole straight through the side (black line is the
center of the drill) and the top (white line is the center). The drill bit
should not be bigger than the flat part on the side of the rail.
2.
With the drill bit, drill a hole straight through the side (black line is the
center of the drill) and the top (white line is the center). The drill bit
should not be bigger than the flat part on the side of the rail.
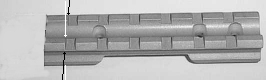
 3.
With the cutting wheel cut 2 lines from the edge of the rail to the edges of the
hole on the top. When the center piece is out use the grinding bit to make
the hole as wide as the center of your rear sight.
3.
With the cutting wheel cut 2 lines from the edge of the rail to the edges of the
hole on the top. When the center piece is out use the grinding bit to make
the hole as wide as the center of your rear sight.
 4.
Do the same as you did in 3 to both sides, be sure to be perpendicular to the
middle of the side, not at the angle of the top and bottom of the rail.
4.
Do the same as you did in 3 to both sides, be sure to be perpendicular to the
middle of the side, not at the angle of the top and bottom of the rail.
5. Cut the bottom of the rail that is sticking out in half.
6. Fit the rail to the gun. It will probably not slide on
all the way the first time, use the grinding wheel and sand paper to gradually
widen any part of the rail that is too narrow to let the sight fit.
7. Sand down any sharp edges and clean the rail.
8. Paint the rail.
9. Take your gun to a good gunsmith and have him attach the
rail. It cost me $10 per hole ($30 total) to drill and tap it.


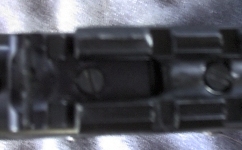
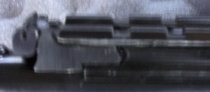
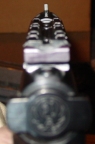
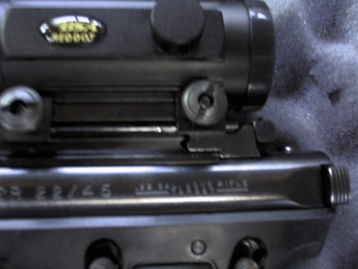 What
did I do to customize my scope rail? Well, you can't tell from a distance
but my rear sight is still mounted under the scope. I wanted to do this
because if the scope fails, battery dies, or I just get board with the dot I can
remove the scope in a few seconds and still be able to aim.
What
did I do to customize my scope rail? Well, you can't tell from a distance
but my rear sight is still mounted under the scope. I wanted to do this
because if the scope fails, battery dies, or I just get board with the dot I can
remove the scope in a few seconds and still be able to aim.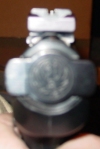
 wheel, grinding wheels, grinding bit and drill bit)
black paint, sand paper and a gunsmith (drill and tap for mount). It is
not necessary to remove the rear sight but it makes it a little easier.
wheel, grinding wheels, grinding bit and drill bit)
black paint, sand paper and a gunsmith (drill and tap for mount). It is
not necessary to remove the rear sight but it makes it a little easier.