Bolt Assembly

Home Interests Guns

Assembly Info Scope Rail Trigger Shield Clark Trigger Volquartsen Sear V-Comp Holster 1911 Grips


Field Strip
Trigger Assembly
Hammer Assem.
Sear Assembly
Mag Rel Assem.
Magazine Assem.
Bolt Assembly
Diagram(s) of part names in this assembly:
fieldstripdiagram.jpg (170654 bytes)  boltdiagram.jpg (124966 bytes)

Disassembly of the Bolt

1.  Field Strip the gun. (Instructions)

2.  Lift out Recoil Spring Assembly (Fig. 1).

3.  Remove Firing Pin Stop (Fig. 2 red arrow).

4.  Lift out Firing Pin and the Rebound Spring and Support (Fig 3).

5.  Push down and hold the Extractor Plunger (Fig. 4 red arrow).  Rotate the top of the Extractor to where the hook is trying to touch the bolt face (Fig. 4 blue arrow), to make the bottom of the Extractor appear .  Slide the Extractor sideways at 90 degrees to remove (Fig. 4 green arrows).  You may want to hold the bolt so the green arrows point at the ground to allow gravity to help remove it.

6.  Release pressure and remove the Extractor Plunger and Spring.

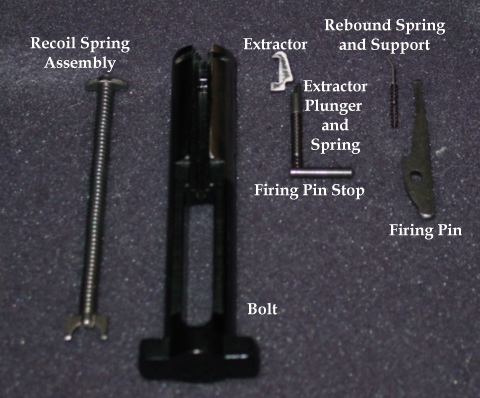
Assembly of the Bolt

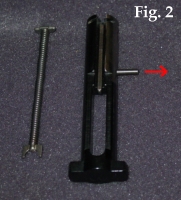
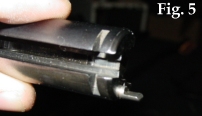
1.  Insert Extractor Plunger and Spring with the longest end facing out (Fig. 5).

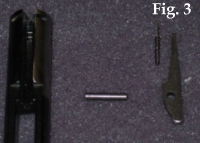
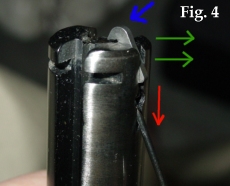
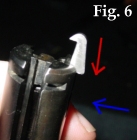
2.  Push the Extractor down on the Plunger until the tip of the Extractor touches the bolt face (Fig. 6 red arrow), then push the Extractor in to lock it into place (Fig. 6 blue arrow).

3.  Install Rebound Spring and Support, bent end down (Fig. 7 blue circle).

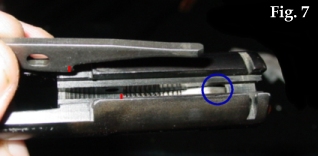
4.  Install the Firing Pin so that the end of the Rebound Spring is touching the part sticking out below the Firing Pin (Fig. 7 red lines).

5.  Install the Firing Pin Stop by pushing forward on the Firing Pin to line up the holes.

6.  Install the Recoil Spring Assembly with the curved end matching the curve of the bolt.

7.  Reassemble the gun.