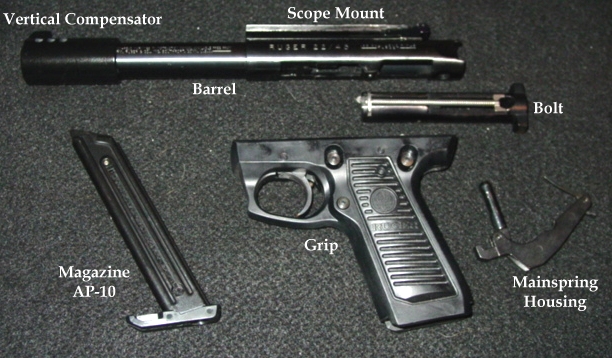
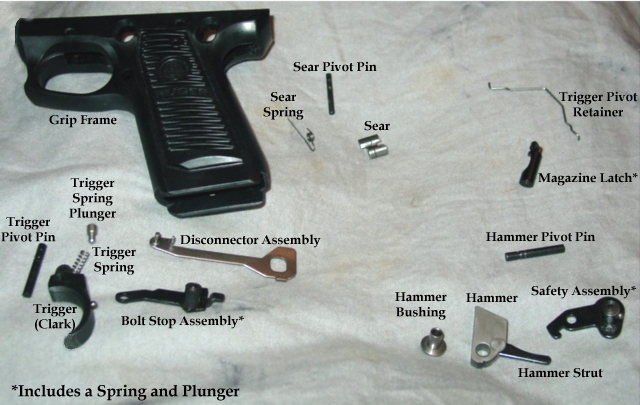
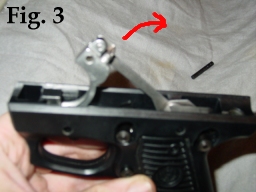
Assembly of Trigger and Bolt stop
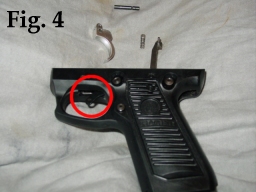
1. Insert the Bolt stop assembly by lining up the finger
button with the hole, have the other end sticking out of the trigger
guard. (Fig. 4)
2. Rotate the bolt stop assembly clockwise and let the end
of the assembly rest inside the grip, there is a small groove it sits in.
3. Insert the spring and plunger into the vertical hole on
top of the trigger.
4. Insert the round end of the of the disconnector
assembly into the top horizontal hole on the trigger and rotate the
trigger so the plunger is being held in by the bar sticking out of the
disconnector assembly. (Fig. 5 red circle)
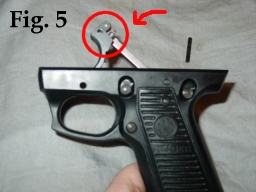
5. Rotate the trigger and disconnector assembly counter
clockwise and into the trigger guard. (Fig. 5 red
arrow) If the bolt stop is not resting in the grip or is still
sticking out of the guard, the trigger will not go in all the way.
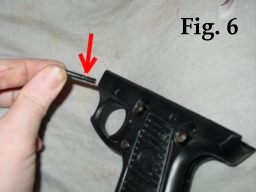
6. Insert trigger pin. The notch in the pin should
be on the opposite side of the bolt stop assembly. (Fig. 6 red
arrow) Some wiggling of the trigger is usually needed to get the
pin properly aligned.
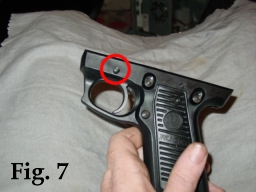
7. The pin will go most of the way in except a little bit
(Fig. 7 red circle). You need to push
down on the Trigger Pivot retainer, like you did in the disassembly step
4, and push the pin until it is flush with the frame.
8. Using the back of a small drill bit (without
holding down the trigger pivot retainer) push the pin farther into the
grip until a "click" is heard. This means the pin is
locked in by the retainer and should not vibrate out.
9. Assemble the gun as normal.